Recent Tweets

Panasonic Heralds New Lumix DMC-G5, LX7 and Compacts


Panasonic has announced the latest in their range of G-series mirrorless compact system cameras will be the Lumix DMC-G5

Boasting a new - and very comfy looking - grip design that's sure to assist in stable shooting,  the G5 also features a 16 megapixel liveMOS sensor, re-designed Venus Engine image processor and 920K-dot free-angle Touch Screen LCD.

Other notable specs include Light Speed AF,  high-speed continuous shooting at 6 fps, and a pretty neat 1,440K-dot eye-detect EVF that starts the AF focusing as soon as you raise your eye to look through it. 

And, of course, what self-respecting digital camera would be without full HD video capability these days? Certainly not this one, incorporating 1920x1080/50p with stereo audio, full-time AF and Touch AF for executing sweet pull focus, just like the pros!


Along with the G5, Panasonic has announced the latest in their high-end compact series, the Panasonic Lumix DMC-LX7 (pictured above). The LX7 looks pretty neat, boasting a super-fast LEICA DC VARIO-SUMMILUX lens with F1.4-F2.3 aperture range. And sticking with the 10.1 megapixel CMOS sensor with some signal-to-noise ratio improvements should make the LX7 a snazzy performer in low light.


The replacement for the super-zoom FZ150 comes in the form of the Panasonic Lumix DMC-FZ200 (pictured above) - a 24x optical zoom model with a constant f/2.8 aperture! Yes, you read that correctly, folks, f/2.8 at 600mm focal length. Panasonic has amazingly fit this into a compact bridge digital camera. What does it mean? Well, it should give you the ability to capture very distant subjects in dimmer lighting conditions than was ever possible before in this type of camera.

Other announcements include the Panasonic Lumix DMC-FZ60, another big zoom model with 24x optical zoom, similar to the FZ200 but without the faster lens; Panasonic Lumix DMC-LZ20 - a compact bridge camera with a big 21x optical zoom; and the Panasonic Lumix DMC-SZ5 - a slim and compact camera with high quality 10x optical zoom and Wi-fi capability.

All these exciting brand-spanking models should start to become available some time around September 2012.

Re-focus on the Lytro Camera

Lytro Light Field Camera - Red
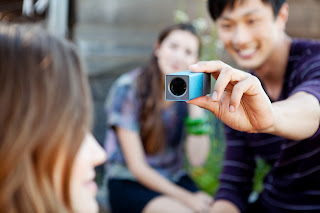
We've heard a lot of buzz around the place about the Lytro Light Field Camera ever since this amazing little technological marvel was announced.

If you don't already know what this tiny beast does, then let us fill you in a little: regular camera sensors
 simply add up all the light rays and record them as a single amount of light. The Lytro captures light travelling in every direction through every point in space.

"So what the heck does that mean?" I hear you ask. Well, one of the neat capabilities of this tech is the ability to re-focus your images - after you have taken them! So you can say goodbye to blurry photos forever as you simply re-focus on the subject you want.

Not only that, the Lytro doesn't have any shutter lag - you know, that annoying time from the moment you want to take your photo to the time the camera actually focuses and shoots - because ... the Lytro has no shutter mechanism! It captures the photo the instant you press the button. Neat, huh?

Lytro Camera In Use


Currently only available in the USA, we hope to see these awesome gadgets in Australia someday ...

Announcing the Canon EOS M!

We can agree that 2012 has already proved a huge year for Canon, with the release of the Canon EOS 5D Mark III, the Cinema EOS system and several new lenses.

The rumour mill started churning very recently about Canon's predicted foray into the Compact System Camera (CSC) market, and by golly it looks like they were right!

As of 2:00pm AEST today Canon has unveiled the Canon EOS M - an all-new interchangeable lens compact with EOS DSLR quality in a tiny package. On paper it almost looks like a shrunken Canon EOS 650D and initial feedback is that this gear is top notch and designed to really shake up this growing camera sector.


Featuring an 18-megapixel CMOS sensor, DiG!C 5 image processor, high ISO range of 100-12800 (expandable to hi-ISO of 25600) as well as the new Hybrid CMOS 31-point AF system, this little powerhouse is capable of producing serious image quality making it attractive not only to new users, but perhaps even seasoned Canon shooters looking for a more portable addition to their kit.

It utilizes the new EFM mount system, compatible with new release proprietary lenses such as the EFM 22mm f/2 STM "pancake style" portrait lens, and via the EF-EOS M mount adapter you can also throw on EF and EF-S lenses make it highly versatile for those with existing Canon DSLR kits.

The Full HD video is also impressive and also includes HDMI Mini output in full high-definition, a rather neat feature in this camera category.
The Canon EOS M is shipping to stores around mid-September, and as yet Canon has not released pricing. However, keep an eye on our website and register your interest to stay up-to-the-minute on this exciting new release:


And yes, it is compatible with the new Eye-Fi memory cards.

Catch it soon at Digital Camera Warehouse!


Canon PowerShot S100 Potential Lens Error


Canon Australia has advised that some PowerShot S100 units (with the serial numbers listed below) may encounter a lens error due to a part becoming disconnected inside the lens. In particular, this lens error may occur when the camera is used in certain environmental conditions such as high temperature and/or humidity.

The only products that are affected have a serial number that falls within a particular range. That is, any serial number where the first and second digits are any number from “29” through “41.” The serial number can be found on the bottom of the camera.

For example: 29xxxxxxxxxx”, “30xxxxxxxxxx”………”41xxxxxxxxxx”

(The [x] characters shown above represent the remaining characters of the product’s serial number.)

If your camera’s serial number does not fall within the range above, you have nothing to worry about and may disregard this notice.

Affected products that exhibit this phenomenon will be repaired free of charge by Canon Australia, regardless of the warranty status, if it is confirmed that the lens error has been caused by disconnection of the part inside the lens.

If you do own an affected product, you may contact Canon Australia Services & Support on 13 13 83 (local call) to arrange for the repair to be carried out. 

Canon Australia apologises to owners of affected products for any inconvenience caused. 

Read more about this service notification on the Canon Australia website.

Digital Camera Warehouse Podcast: Episode 4

Episode 4 of the Digital Camera Warehouse Podcast is up and ready for your listening pleasure.

This month we talk about all the new stuff hitting our website, including the highly anticipated Eye-Fi memory cards, Leica compacts and Metabones lens adapters. You can also hear all about our favourite shooting locations. Why not share with us your favourite spots for getting that perfect photo?

Download and don't forget to subscribe!


Basic Portrait Retouching with Adobe Photoshop

Post-processing of your photos is a vital element in the photography workflow. Luckily in this information and technology age this process is made fairly straightforward with powerful applications like Adobe Photoshop providing an in-depth myriad of options and capabilities to help you get your images looking the best they can be. 

In this short, but hopefully helpful article we would like to give you some pointers on adding a touch of magic to your portrait shots.
The tool names in the article are representative of those in Adobe Photoshop; however the techniques can be applied in many software suites. Consult your manual for the appropriate similar tools in your preferred software.
Find a recent portrait shot you’d like to improve; if possible use a RAW format file so you have the most data available for editing and let’s get started!


1. Check Your White Balance. Do the skin tones present in the photograph look natural? While you may have adjusted your settings in-camera, sometimes indoor lighting can be difficult to balance correctly. If your white balance needs adjusting, a simple way of doing this is as follows:

Click “Add level adjustment layer” by going to Layer – New Adjustment Layer - Levels and select “Auto”. Did this work? Sometimes it won’t do much of anything to improve your image. If that is the case we need to go deeper (and this will likely yield a better result anyway!).

Use the three “eyedropper” icons to pick the black, grey and white samples from your photo. Typically you can get away with simply using the black and white tonal value selectors, but if you find your images still requires further adjustment try picking grey as well. For these finer adjustments, hit up Image – Adjust – Hue/Saturation and make your finer adjustments to the colour there, paying attention to the overall tones in the image – if it starts looking a little too cool or warm bring the levels back slightly until you find a natural look.


2. Spot healing and skin softening. Everyone, even the big stars have skin marks and imperfections. Take a high-resolution photo of a face and they will often show up quite prominently. If you’d like to mask these a little, there are a couple of things you can do.

Spot healing tool (In the expandable Band-Aid icon on the tool panel) – This is a handy tool for removing blemishes, acne scars and other marks on the face. Don’t go completely nuts with it – just dab it over the real imperfections, don’t go removing every line and freckle as not only will the overuse give the image a plasticky look, it will remove the unique features of the face and the natural structure.

If you simply want to improve the appearance of something, such as a hairline with deep follicles or a mole, the clone tool can be a better option. Adjust the opacity for a more translucent effect that works well for natural blending of skin areas.

Skin softening – Everyone loves to look smooth and young, but overdoing this in the editing process will alter the natural look of the model – refining and softening the skin will give the face a lovely glow, but do keep it realistic or the person will look like a wax dummy. Less is more. Here’s a quick way:

First, duplicate the layer (Command+J on Mac, Control+J on PC).

Then invert that layer (Command+I/Control+I).

Add a “high pass” filter to the layer. You can do this by hitting Filter – Other – High pass. Use around setting 5. Hit “OK” and set the blending for the layer to “overlay”. Right now it may look quite scary, but we are not done yet.

Add “Gaussian Blur” by hitting Filter – Blur – Gaussian Blur and set this to half of the High pass filter setting, so 2.5 for the sake of this example. This should have it looking better.

If you like, you can now add a layer mask and work the face detail like lips and eyes back into the image if you have already worked on them.


3. Clean up the eyes. Perhaps the model still has glassy morning eyes, and some people simply have a redder look to their eyeballs in general. If you’d like to make them stand out by making the whites a little whiter, do the following:

Add a new blank layer (Perhaps change the name to something like “eyeball clean up”).

Change the blend mode to “Color”.

Pick the brush tool and ensure the opacity setting is around 50%.


Hold the ALT key down and pick some “good” white from the eye as a sample. 

(ALT+click on the good sample).

Paint the vessels and blotches with the brush tool.


Adjust the opacity of the layer if you find it looks a little overcooked.


And there you have it! Three tips for improving your portraits.

Check out our Adobe software products!

It's Video Month at Digital Camera Warehouse!

Hey there budding videographers,

We're having a little promotion this month and if you're in the market for a new camcorder then you really should check it out.

We've got special prices and bonuses across a huge selection of our video camera range, including the unstoppable GoPro mountable action cams, Sony HandyCam models, Canon (including the professional X-series models!), Panasonic and more.

Don't take our word for it, take a look and score useful bonus items like batteries, memory cards and DCW gift vouchers.


Get on board and hurry - it's only for the month of July 2012!


Nikon D800 Experience Night: Canterbury Store

From time to time, we folks here at Digital Camera Warehouse hold in-store events around a number of products. On Tuesday June 26, we held an experience night for the brilliant new Nikon D800 - the newest and arguably the most serious force in the pro DSLR camera market.

There was a turnout of customers some of which had already purchased and received this rather scarce item and others who were keen to see what all the fuss was about.

Andrew King, a pro equipment specialist from Nikon Australia, presented the D800 and a variety of lenses, describing the features including the new and insanely fast 51-point AF (auto focus) system and the Full HD video mode which has to be seen to be believed. 

The fine detail, pristine colour reproduction and intuitive operation of the system make the D800 a joy to use and many punters felt the same.


While this event was held in our Sydney store in Canterbury, we know many of our interstate customers would love a similar experience night. Brisbane and Melbourne - we are working on it!


What do you think about the D800 (and indeed the Nikon D800e - the same camera with the optical low-pass filter removed from the sensor)? Check it out: Nikon D800/D800E.


Studio Lighting Tips: Three-Point Lighting Setup


If the photography bug has bitten you hard and you want to start doing some serious shooting, you might want to think about kitting yourself out with some lighting gear. If you’ve never used your own external lighting setups before, it can be a learning curve but the rewards are rich. See below for some great tips on getting better photos with controlled lighting:

1   Okay, first things first. Great lighting can be let down by poor composition and posing, especially when it comes to portraits. Take the time to set the scene properly. Watch for shrugged shoulders, stiffness, slouching and striking features hidden by poor positioning. You can also make use of props and accessories, and be sure to pay attention the background of your photos – it is better to enhance than detract from your subject.

It can be a little overwhelming playing director and having to guide your subject so specifically, but the results can be stunning. Try and breath some natural life into what can be seen as quite a rigid situation – tell a joke to get natural expressions of happiness and laughter, or give a totally left-field direction and you might just strike a gold pose. 
Just remember to keep snapping and try different things.


     There are many lighting setups, and once you learn the ropes you will be an unstoppable lighting machine that will have many ideas on what works for you. Portraits tend to be shot with a three-point lighting setup, and that is what we will focus on.

The Three Points:

1.       Main (or Key) Light:

This is your main lighting source, and is the primary point of illumination of your subject.  You can use a speedlite [ADD LINK] for this or a studio lighting kit [ADD LINK], sometimes referred to as flashes or strobes.

If you are using a speedlite, get it off your camera! On-camera flash can cause flat lighting, whereas you can use it to much greater effect off the camera with a flash trigger.

By using an off-camera light source you can use shadows and highlights to enhance bone structure, skin tone, eyes and other features of your subject’s face that you may not normally achieve.

No matter how good you get, with lighting comes testing and repositioning until it looks right. This can take an indeterminate amount of time! Be patient.

2.       Fill Light
 
This light will help soften harsh shadows caused by the main light. This will improve overall results and give your shots a more professional edge, though it is optional and if you are starting out and only have one light you can try reflectors to soften hard edges.

In terms of positioning, if the main light is to one side of the camera, the fill light is typically placed on the opposite side.

3.       Background Light

As you might have guessed, this one lights the background.  It will light up whatever happens to be in the background, which is essential if you have gone the whole hog and put together a set with props and the whole shebang.

The light is placed typically behind the subject, and is pointed at the background. Again, this is an option depending on your exact shooting situation, but if you don’t have a background light you can get away with using a dark backdrop in its place.


And there you go! As with anything in photography, it will take practice and you will be sure to have a ball while improving your skills. You won’t believe the difference some controlled lighting can make, so do feel free to check out our extensive range online, or pop into one of our stores to ask our knowledgeable staff.

Linky linky:

You wanted it, you got it.

Did you know that Digital Camera Warehouse produces home-grown video content just for you?

We have created some great tutorial videos to help you with studio lighting, portrait-taking and low light gig photography. These are just some of the videos on offer and these are updated frequently, so keep your eyes on PurVi: Purple Vision Videos from Digital Camera Warehouse!

Here's Al giving you the low-down on Low Light Gig Photography:


Need more? Head on over to the PurVi Page: