Recent Tweets

Showing posts with label tripod. Show all posts

Photographing Water - in all its glory!

Photographing Water 
We’ve all seen those great landscape photos of the beach with wonderfully soft looking water washing onto shore or silky smooth waterfalls flowing over the edge of a cliff.  How do we recreate this?  It’s actually quite simple, there are just a few things that need to be done to create this effect.

Canon 5DMK2 with 24 -70 L at 24mm, ISO 100, f22 @ 2.0 Seconds.
Shot at Isabella Falls near Edmonton, Far North QLD 


Technique
The technique is very simple: long shutter speeds with your camera on a tripod.  But there can be problems that you will need to correct, for example, your shutter speed is not slow enough due to the scene being too bright, the sky blowing out above the scene due to too much light hitting the sensor from bright parts of the image, water ruining your equipment, camera movement, etc.  There are a number of pieces of equipment that can solve these issues.

Equipment
Before we head off and attempt these images there are a few things which are absolutely essential and a few things that are nice to have.


  • Camera – Your camera should allow you to adjust ISO, aperture and shutter speed.  This will give you total control over your exposure.  The shutter speed needs to be able to stay open for at least a few seconds to properly blur the water movement.  A CSC or DSLR would be ideal but you can get good results from higher end compacts, as long as they allow you to control the exposure variables (ISO, aperture etc.).  Wide angle lenses are ideal.
  • Tripod - A good, solid tripod is ideal, try to stay away from the cheaper tripods as they can have some movement in them with factors such as wind.  Heavy tripods are more stable over long exposures.  Also the shorter you have the legs, the more stable the tripod due to the lower centre of gravity and less flex.  Generally with landscape composition it’s a good idea to be low to the ground anyway and some tripods can go lower than others.
  • Shutter Release - The shutter release allows you to remotely activate your cameras shutter, either with a cable (which is ok) or wirelessly (which is much better).  The wireless option eliminates the possibility of you causing movement in the image due to snagging or accidentally moving the cable.  Wireless shutter releases generally do more than just release the shutter, some of them allow you to do multiple exposures for star trails or time lapse movies.
  • Filters - There are a few filters you can use.  The most obvious one is the neutral density filter (ND) which reduces the amount of light getting to the lens.  This slows down your shutter speed allowing the water movement to be slowed down to give a silky water effect.  This filter is available in darkness ratings from ND2 (blocks one stop of light) all the way up to an ND400 (stops 9 stops of light).
  • The other is a circular polariser (CP) filter.  This filter removes or reduces reflections off of non-metallic surfaces, including water, glass and tree foliage and grass.  This tends to make water look clearer as it removes reflections from it allowing you to see through the water easily.  It also makes colours seem more saturated: think bluer skies and greener grass.
  • The last filter to consider is a graduated neutral density filter (GND); this one is clear on one end but dark on the other with a gradual move between the two ends.  Here is a link to a Cokin kit that starts you off with three filters and a holder.  This filter is used in landscape photography to darken the sky if it’s overexposed in the image.  For example, if the sky has lost all details due to over exposure but the waterfall is correctly exposed then you would use the GND filter to reduce the brightness of the sky but leave the waterfall correctly exposed.

The Shoot
First you need to find the right location.  Ideally this would be a spot where the water is moving noticeably such as a beach where the waves are hitting the sand or a rocky outcrop in the foreground.  A waterfall or quick moving stream are also good to photograph as you can smooth out the water to give a nice effect in contrast to static rocks in the stream.

When you are setting up in these locations you need to be mindful of your safety and the safety of your equipment.  The nature of these places can be slippery and rocks are very unforgiving to falling gear and people.  I have smashed a lens shooting a waterfall before and it’s a bad feeling when you see it happen.  Also watch out for wildlife (snakes, spiders and leaches) that can make surprising appearances at surprising times and also can lead to damaged gear.

Set up your tripod low to capture the foreground clearly in the image and try to relate the foreground to some background elements, this brings a cohesive nature to the photo.  Make sure to get your camera level (using one of these) and then attach the filter.  Note that some filters can make it impossible to see through the lens to focus, for example an ND400. In this case you will need to focus prior to attaching the filter. 

When exposing the image to get the water smooth, set a slower shutter speed.  How slow will depend on several factors such as the speed of the water, the limits of your equipment and even whether you are shooting between waves and need to move out of the way before you get drenched.  The longer the shutter speed the smoother ocean waves will look in the final image.  Waterfalls can be exposed for as little as 1 second and get good results as the water is falling so fast that it blurs very quickly.  Experiment to find what works best for you in the situation you are in.  You can slow the shutter speed down further by using one of the ND filters, the darker the filter, the slower the possible shutter speed.

In the two photos below the one on the top had a shutter speed of 1/20th of a second and you can still see some definition in the water drops.  The photo on the bottom had a shutter speed of half a second and the water is much smoother in appearance.
 
Canon 5DMK2 with 24-70 L at 46mm, 
ISO 500, f4 @ 1/20th Second
Shot at Baron Gorge, Cairns
Canon 5DMK2 with 24-70 L at 46mm, 
ISO 500, f13 @ 0.4 Seconds
Shot at Baron Gorge, Cairns

When exposing for long times it’s important to remember that any movement made by the camera will result in a blurry image. As already mentioned a good tripod is very important.  Also set your camera (if it has the function) to “pre mirror lock up” which reduces mirror slap movement by locking the mirror up when you press the shutter once and then taking the photo on the second shutter press.  Also make sure to use a cable or wireless shutter release to stop your finger moving the camera when firing.


The Last Rule
The last rule is to experiment!  Leave the shutter open longer and see what happens, move your filters around, get coloured sunset filters, change your white balance setting or adjust your aperture.  Continually try new things and shoot as much as you can, there is no substitute for getting out there and catching some light!  Go on over to Facebook and send us some shots that you’re proud of!  Good Luck!


Shooting Haunted Houses and Kids (for Halloween)

We like to turn any event, celebration, gathering, holiday and weekend into a reason to take photos. And with Halloween coming up and the potential for lots of ghouly and gruesome night shots, we thought some hints and tips would be useful.

Capturing special effects and lighting

When photographing houses to capture special effects and lighting, long exposure photography is a great option. You will be able to capture the decorations and special Halloween lighting on houses.
In terms of equipment, use a sturdy tripod to keep your camera steady and your photos sharp - some exposures can be as long as 30 seconds which is impossible to hand hold.  
To get the best results, shoot with a moderately low ISO in the range of 100-400, to keep sensor noise to a minimum.  This will give a much cleaner result to your shot.  
Shoot in RAW to give yourself the ability to recover detail in bright and dark areas in your post processing flow.  When taking the photo use a cable release, either a wired or wireless one; this will prevent camera shake if you accidentally move the camera when pressing the shutter button at the start of your exposure.  
Experiment with your exposure to get the best result, overexpose by a couple of stops to see what the results looks like. No need to follow the rules, just have fun!

Capturing the creepy kids!

It’s not just decorations and lighting you will want to capture. Taking photos of your kids in costume can be great fun.  Using some off-camera flash with gels can add awesome light to your image.  A good trick is to fire the flash from behind your child-zombie who is facing toward the camera. This will give a backlit silhouette effect that looks great.  Try with any colour gel (a green or orange one looks great).  
 

Placing the flash in different places around your kids to change the effect and using a slower shutter (approximately 1/8 of a second) will also capture any lights or decorations in the background.  This is great for ambience and to help set the scene.  For this type of shoot you will need a DSLR, an off-camera flash, flash trigger and some gels.  If you hand hold the camera, be sure to increase your ISO to capture the background lights.  
This should be a fun shoot. Experiment with anything you can think of - there are no limits to what you can try!

Timelapse Photography

Shooting a time lapse is getting more and more popular.  It is a lot easier for the general public to produce time shifting videos and much cheaper than it was ten years ago. Time lapses combine all the challenges of still and moving photography in one and the results can be spectacular.  So what are you waiting for?  

What do you need for a time lapse shoot?

As a basic set up you should have a DSLR camera and lens, a sturdy tripod, a remote shutter release (preferably with an interval timer), a watch and a note pad.

The first decision is, of course, what to shoot.  A cloudy sky is great, as you can really get a sense of enhanced speed and movement and see what this method is capable of with an easily accessible subject (we all have a sky nearby). 

Set up your camera so you have primarily sky in the frame but make sure to include a static area as well like a mountain or some buildings as it can look a bit odd to see just moving clouds with nothing to let your eyes "rest" on within the finished video.

Take a few test shots just to get the exposure correct.  Remember to turn off the autofocus on your lens and also set your camera to manual mode so you don't get any variations in exposure as the clouds move across the frame.  Moving clouds can cause the exposure to change when set to auto.  This is very distracting in the final video, showing up as bright or dark frames. 

Next step is to work out how long you want the video to run for.  This is the maths part. Keep in mind that to ensure your video looks smooth you will need to have at the very least 16 images per second when you make your final movie. This is because the human eye cannot pick up that many pictures one after the other at 16 frames per second so it looks like a movie instead of several photos. Aim for 25 frames per second (fps) to get the smoothest result. This means that to get one second of video you need to shoot 25 photos. So if you want a 20 second clip you need to shoot 25 frames per second. This is a total of 500 images as 20 seconds X 25 frames per second (fps) = 500 images. You can work out how many frames you need by simply substituting the first number (how many seconds you want your movie to run for).  If maths isn't your strength then there are a few good free Apps that automatically calculate this while also allowing you change all the other parameters.

Now you need to work out your interval and shutter speed. Your interval is dependent s on the speed at which your scene is changing and also how much you want to speed up the scene. If a storm is rolling in and the clouds are moving quickly you will need to shoot at every second or quicker so that the end result doesn't look too "jumpy" i.e. there shouldn't be an obvious jump from one frame to the next.  If the clouds are moving slowly then reduce your interval to about 2 seconds or longer.

When choosing your shutter speed, the golden rule is that your shutter speed should be the same length as your interval time.  So if your interval is one photo per second, your shutter should be open for 1 second every time as well (this is often referred to as a 180 degree shutter).   Longer shutter speeds are also better because there is less chance of a darker or lighter frame due to slight variations in the shutter speed from one frame to the next with a quicker shutter speed.  

Make sure your memory card is empty, as nothing is more frustrating than getting halfway through your shoot and having to change cards as it equates to a dropped frame rate in the final video due to the frames missed while you changed cards.

Should you shoot RAW or JPEG?  

It depends on the amount of post processing you might need to do. I reduce the size of RAW files on my 5D to about 3 megapixels. Remember that HD video is about 2 megapixels. They take up less space on the memory card so there is less chance of running out of space halfway through the shoot. 

Now is when you need an interval timer.  I use the HahnelGiga T Pro wireless timer remote. I pick the interval required and set it on continuous release so that it will keep shooting at the chosen interval until I manually stop it. 

Your final checklist before you head out should include additional charged batteries, empty memory cards and the equipment listed at the start of this article.  Also take along anything you would normally use when shooting landscapes because essentially that’s what you’re doing with the only difference being that this capture moves.

Below is a video made according to the instructions provided here.  It was shot for 25 minutes as the sun set using a Giga T Pro interval timer.  The video is playing back at 25 frames per second, so for every second of video there are 25 still photos used.  The photographs were taken every 4 seconds with an exposure time of 2 seconds per frame.


Macro Photography – A Good Setup and Patience is all you need


Have you ever wanted to attempt macro photography but weren’t sure where to begin?
If so, read on for some useful tips.


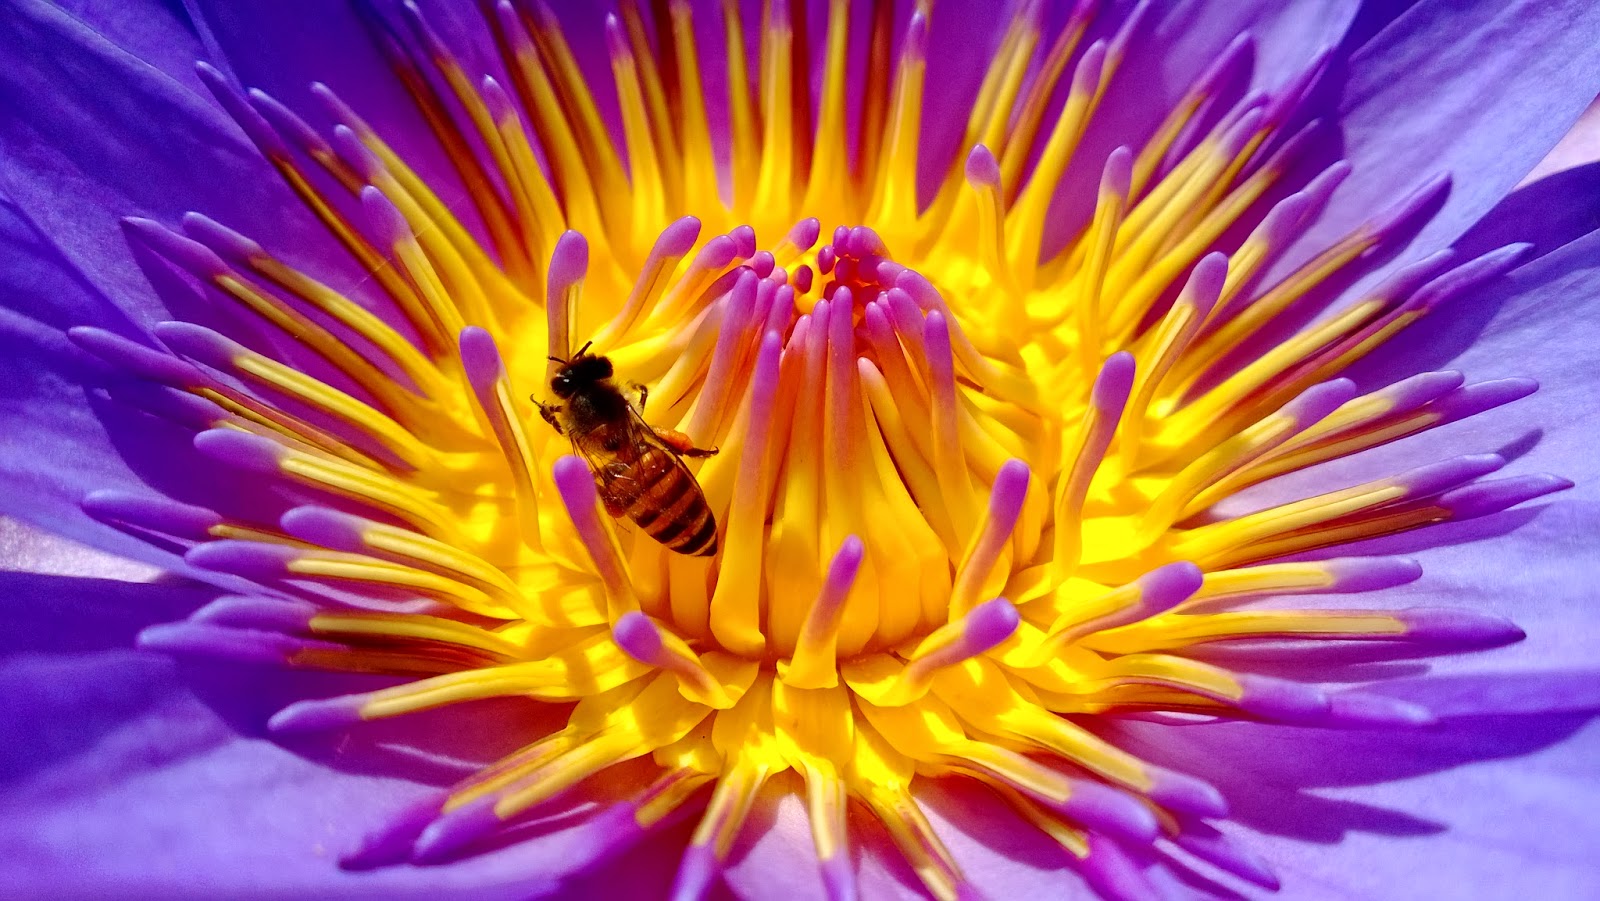
Macro photography is any type of close up photography that magnifies a subject to life size or greater.  This is called the magnification ratio and is seen on lenses like this: 1:1. A proper macro lens will reproduce at this ratio and some, like the Canon MP-E 65  will actually magnify up to 5 times larger than life size.  This would magnify a grain of rice to fill the frame of a full size DSLR sensor!

Successful macro photography can be a challenge and will certainly take practice and a lot of trial and error but when you get that perfect shot it will all be worth it.

Firstly, obtain a proper (1:1) macro lens or extension tube.  A dedicated macro lens  is important as a normal lens will not focus close enough to get any sort of detail in very small subjects.  Keep in mind that a macro lens can be used for general photography as well.  A cheaper alternative are the use of extension tubes (not to be confused with extenders) which increase the distance between the lens and the image sensor to allow you to focus at closer distances.  Either of these will ensure a good start in macro photography.

Manual focus is the name of the game.  A static object like a flower (assuming there is no wind around) or a shell is easier to focus on, simply because the only movement variable is you.  If you are using a good tripod, preferably with a macro slider, then it simply requires a little patience to obtain a sharp image.  Additionally, the use of a relatively small aperture such as f11 or f16 will provide more depth of field in the image.  Keep an eye on your shutter speed and use a remote release or the camera’s built in self timer mode to eliminate camera shake.  If your camera has a mirror lock up mode then this function would also be good to utilize.

Pre-focus is another great option. If you are trying to photograph insects a good tip is to set yourself up in an area where your target is likely to land or pass through and pre-focus on that spot.  A wireless remote release is a very helpful here as it will allow you to step away from the camera and begin firing as soon as your subject lands in the target zone. You may get a lot of unusable shots, but on the flip side you may also capture that perfect shot.

When thinking about lighting, the closer something is to the front of the lens generally means the difficulty to light it sufficiently increases.  In some cases your lens may actually cast an unwanted shadow on your subject.  Macro flash attachments (ring flashes) are very useful as they sit at the end of your lens to illuminate the subject.  You can also get constant light LED attachments that are not as powerful as a ring flash but are cheaper.  If outside, the sun can provide enough lighting for some subjects and you can use a diffuser to soften the light or to bounce light into the shadows.  

Every scenario is different so initially there may be an element of trial and error but hey, that's the fun of it!


Valentine's Day Photo Tips


With Valentine's Day fast approaching, here are ten quick tips to assist you in capturing the special moments with your loved one this February 14th.

1. Avoid Flash Photography

Where possible, preserving the natural ambience of a scene such as candle lighting will produce an authentic capture of the mood and setting.

2. Candid Shooting

While posed shots are good, capturing candid moments will provide you with a lasting memory of that spontaneous action.


3. Tripod and Timer Use
When taking ‘selfies’ with your loved one, consider using a tripod in conjunction with your camera’s timer-countdown function to ensure camera shake is minimal. Additionally, utilizing the camera’s burst-mode to take multiple exposures not only paves the way for spontaneity, but will also increase your chances of a perfect shot in case of blinking.  

4. Close-ups

Zoom-in to capture various emotions of the day including that priceless smile or a special gift exchange moment.

5. Silhouettes

Silhouettes are a powerful method of capturing romantic scenes with a dramatic vibe.

6. Props

Utilize sentimental items and/or Valentine’s Day related props to give your photograph a fun and playful edge that encapsulates the subject’s personality.

7. Depth of Field Control

Draw attention to the desired subject(s) by exploring depth-of-field settings. A beautifully soft out-of-focus background adds visual value to the occasion.

8. Be Mindful of Your Surroundings

Keep an eye on your background and surroundings to avoid any objects that may cause distraction.

9. Objects and Elements

Special objects and elements such as a table setting, gorgeous scenery or a present are fantastic for showcasing unique highlights of the day.
10. Digital Darkroom        

The post-photography process can be a fun stage of creative exploration via your favourite photo-editing software suite. Digital filters and effects can add various levels of class or change the scene dynamics to suit your desired style.
Until next time folks, enjoy the month ahead and may it be filled with cherished memories!