Recent Tweets

Showing posts with label Manfrotto. Show all posts

Top 5 Gift Ideas Series: Part 5 - Backpacks

Top 5 Camera Backpack Christmas Gift Ideas 


In this Top 5, we’re breaking down some of our favourite camera backpacks. Bag shopping is a tricky subject, especially if you’re doing it for someone else. But fear not! We’re here to help. 
Below, you’ll find a range of different sizes and price points to suit your gifting needs. We’ve also listed why we think they’re great, and what kind of photographer they might work for.


1 – After the Fact Diaz Backpack


Kicking things off is the super-affordable ATF Diaz backpack. Its well-padded, customisable interior can hold a DSLR or mirrorless camera with 3-4 lenses. There’s accessory pockets too, including one for a 12-inch tablet and even an external tripod carry strap. It makes an excellent first camera bag. 

  • Fits DSLR or Mirrorless Camera and 3-4 Lenses 
  • Adjustable Padded Dividers 
  • Dedicated 12-Inch Tablet Sleeve 
  • Accessory Pockets 
  • External Tripod Carry Strap 
  • Comfortable, Adjustable Shoulder Straps 
  • Water-Resistant and Durable Nylon Exterior 
  • Waterproof Rain Cover Included 

2 – LowePro Tahoe 150 Backpack


The LowePro Tahoe 150 backpack is another small, lightweight backpack with an ultra-customisable interior. It’s ideal for a mirrorless kit with 3-4 lenses, plus accessories. Accessory pockets keep all your small bits and pieces organised, making it a great daypack option. 
 
  • Fits Small DSLR or Mirrorless with 3-4 Lenses 
  • Customisable Internal Padded Dividers 
  • Expandable Internal Compartment 
  • Accessory and Organiser Pockets 
  • Comfortable, Adjustable Shoulder Pads 
  • Dedicated Tablet Storage 
  • Weather-Resistant Material Construction 
  • Ultra-Lightweight Design, Ideal Daypack 

3 – Manfrotto Advanced Tri Backpack


Starting to get into more serious territory is the Manfrotto Advanced Tri Backpack. It fits a camera and up to 5 lenses along with accessories and personal items. You can also carry a 15-inch laptop and a tripod externally. With 3 different ways to wear the bag, it’s perfect for active photographers. 

  • Fits DSLR or Mirrorless with up to 5 Lenses 
  • 3 Carrying Styles - Backpack, Sling and X-Position 
  • Separate Compartments for Photo & Personal Gear 
  • Customisable Padded Interior 
  • Rigid Padded Dividers for Protection 
  • 15 Inch Padded Laptop Pocket 
  • Tripod Attachment Loops 
  • Rain Cover Included 

4 – Tenba Axis 20L Backpack


Tenba’s Axis 20L backpack has a very tactical look that might appeal to more urban or outdoorsy shooters. There’s plenty of ways to attach more storage or other accessories to the outside of the bag. It’s also super-durable, so it’s a great choice for getting out into nature or just everyday life. 

  • Fits 1-2 Cameras and 4-7 Lenses 
  • 3 Openings for Easy Gear Access 
  • Dedicated 15-Inch Laptop Storage 
  • Accessory Pockets and Organisation 
  • Additional Attachment Loops 
  • External Tripod Carry 
  • Adjustable Shoulder Harness 
  • Durable and Weather Resistant 

5 – Peak Design 20L Everyday Backpack


The Peak Design Everyday backpack sits at the premium end of this category, combining function and good looks, something a lot of photographers desire. It doesn’t look like a photo bag, which is a more inconspicuous for travelling, but also means you can use it every day. Just like the name says. 

  • Holds DSLR or Mirrorless Camera and 4-6 
  • Built-in Expansion with MagLatch Locking Mechanism 
  • Customisable Interiors with FlexFold Dividers 
  • Three Side Access to Main Compartment 
  • Quick Adjustment Shoulder Straps 
  • Top Handle & Briefcase Style Side Handle 
  • Versatile External Carrying Options 
  • Durable and Water Resistant Shell 

If you’re still having difficulties, just give us a call or drop us an email or comment! The team at DCW is always happy to have a chat about gifts and gear!

Also, be sure to check out our ‘Gift Shopping for Photographers Cheat Sheet’ from last year! It’s still full of great shopping tips and ideas.

Filters - Getting Creative with your Filter Options

Filters - Traditional vs Digital

Since the advent of digital photography the use of many effects filters has been largely made redundant.  This is because almost all of the effects achieved by traditional filters can be recreated through image editing software which can apply unlimited types of filters onto the same image.  

However, there are some filters which cannot be easily recreated digitally and these continue to be used on interchange lens cameras (DSLR & mirrorless) today.  Below we have listed these filters along with a description on when you would use them in your photography.

Circular Polarising Filters

The circular polariser is a very useful filter.  It can be effective in both colour and black + white photography; particularly with landscapes, seascapes and architecture type shots.  Its trick is reducing reflections off all non-metallic surfaces, including the atmosphere.  Landscape photographers use it for making a blue sky appear a deeper shade of blue.  Other uses include making foliage look greener by cutting back the glare coming off the leaves and also removing reflections off water so you can see into the depths.  This allows you to see fish in a pond that may have been lost due to reflections from the water’s surface.  

This filter will also allow you to see more clearly through glass windows by cutting out the reflections.  Some windows that have a polarising film on them, for example some aircraft windows, will cause you to see a crazy rainbow across the frame, this is called 'cross polarisation’. It happens when you have two polarising filters in front of your lens.  The effect that this filter will have will vary according to the angle that the light is bouncing off the subject in relation to your position. 

Without Filter
With Circular Polariser Filter

Neutral Density Filters

A neutral density (ND) filter works by reducing the amount of light that enters your camera by a neutral (no colour cast) filter that absorbs a varying amount of light depending on how dark the filter is.  These come in several shades such as ND2 (1 stop less light), ND4 (2 stops less), ND8 (3 stops less) and even ND400 (a whopping 9 stops).  You can also get variable ND filters that cover the whole range mentioned above in one filter.

Landscape photographers love this filter.  This one comes in handy when you need to extend either the length of your shutter speed, for example when you want waves in the foreground of a seascape to look all smooth and silky, or want to get a very shallow depth of field by using a large aperture in ultra-bright conditions.

The different darkness ratings are used to fine tune the effect and the filters can even be 'stacked' together to fine tune the effect.  Videographers use this filter to adjust the exposure to get the correct shutter speed resulting in smoother looking videos.

ND filters require a tripod and remote release to be used especially if you are required to complete very long exposure times. A tripod and remote release will reduce the chance of camera shake and movement to achieve the sharpest possible image.

Without Filter

With Neutral Density Filter - ND 2

With Neutral Density Filter - ND 8

Neutral Density Graduated Filters

Neutral density graduated filters (ND grads) are used to reduce the brightness over a section of your frame to even out the exposure values across the photograph.  If you have a very large difference between the brightest part of the frame and the darkest part you will end up with either blown out highlights or blocked out shadows. This leads to no information in the highlighted area so you end up with a white haze or no information in the shadows, just a black block.

For example, if we are taking a photo of a sunset and we want to have detail in the foreground so we can see the trees etc. and we also want detail in the sky so we can see all those clouds and colours.  We compose the photo so that the sky takes up the top two thirds of the frame and the ground takes up the bottom third.  We take a reading from the camera which exposes the sky perfectly but the foreground is silhouetted and we can see no details in it.  We adjust the exposure to gain detail in the foreground but when we take another photo we find the sky has blown out and there is no longer any details in the clouds.  

Even shooting in RAW and adjusting later does not always get detail back into these areas, so what is the solution? The ND grad.  If we put an ND grad on the lens and adjust it so that the dark part covers the sky and the light part covers the ground then take another photo then we can see that the dark part of the filter has reduced the brightness in the sky and the clear part has not changed the brightness level in the foreground.  The filter has compressed the contrast in the image, i.e. the difference between the brightest part (the sky) and the darkest part (the foreground) is now able to be captured in one single image and still retain detail in both the sky and the foreground.

Infrared Filters

Infrared filters are a special effect filter that blocks out most of the visible spectrum of light but will let part of the infrared spectrum through.  

These filters can be very handy to carry around with you in your kit bag.  You may not use them all the time but when you need them they are indispensable.  If you have a few different lens filter sizes then maybe consider something like the Cokin filter system.  This way you can buy one filter that can fit on several lenses simply by purchasing an adapter for each lens, rather than a filter for every lens, it's much cheaper and just as good.

Without Filter

With an Infrared Filter

Consider your Next Filter Purchase

The four filter types above offer something that can't be easily achieved in Photoshop.  They can make it possible to do things in camera quicker and easier than digitally manipulating the image later. There are many brands of filters that set out to help you achieve the same if not similar outcomes including Hoya, Manfrotto, Cokin, Kenko and Inca.


Are there any other filters that you can think of that can't be recreated digitally? 

Shooting Haunted Houses and Kids (for Halloween)

We like to turn any event, celebration, gathering, holiday and weekend into a reason to take photos. And with Halloween coming up and the potential for lots of ghouly and gruesome night shots, we thought some hints and tips would be useful.

Capturing special effects and lighting

When photographing houses to capture special effects and lighting, long exposure photography is a great option. You will be able to capture the decorations and special Halloween lighting on houses.
In terms of equipment, use a sturdy tripod to keep your camera steady and your photos sharp - some exposures can be as long as 30 seconds which is impossible to hand hold.  
To get the best results, shoot with a moderately low ISO in the range of 100-400, to keep sensor noise to a minimum.  This will give a much cleaner result to your shot.  
Shoot in RAW to give yourself the ability to recover detail in bright and dark areas in your post processing flow.  When taking the photo use a cable release, either a wired or wireless one; this will prevent camera shake if you accidentally move the camera when pressing the shutter button at the start of your exposure.  
Experiment with your exposure to get the best result, overexpose by a couple of stops to see what the results looks like. No need to follow the rules, just have fun!

Capturing the creepy kids!

It’s not just decorations and lighting you will want to capture. Taking photos of your kids in costume can be great fun.  Using some off-camera flash with gels can add awesome light to your image.  A good trick is to fire the flash from behind your child-zombie who is facing toward the camera. This will give a backlit silhouette effect that looks great.  Try with any colour gel (a green or orange one looks great).  
 

Placing the flash in different places around your kids to change the effect and using a slower shutter (approximately 1/8 of a second) will also capture any lights or decorations in the background.  This is great for ambience and to help set the scene.  For this type of shoot you will need a DSLR, an off-camera flash, flash trigger and some gels.  If you hand hold the camera, be sure to increase your ISO to capture the background lights.  
This should be a fun shoot. Experiment with anything you can think of - there are no limits to what you can try!

Macro Photography – A Good Setup and Patience is all you need


Have you ever wanted to attempt macro photography but weren’t sure where to begin?
If so, read on for some useful tips.


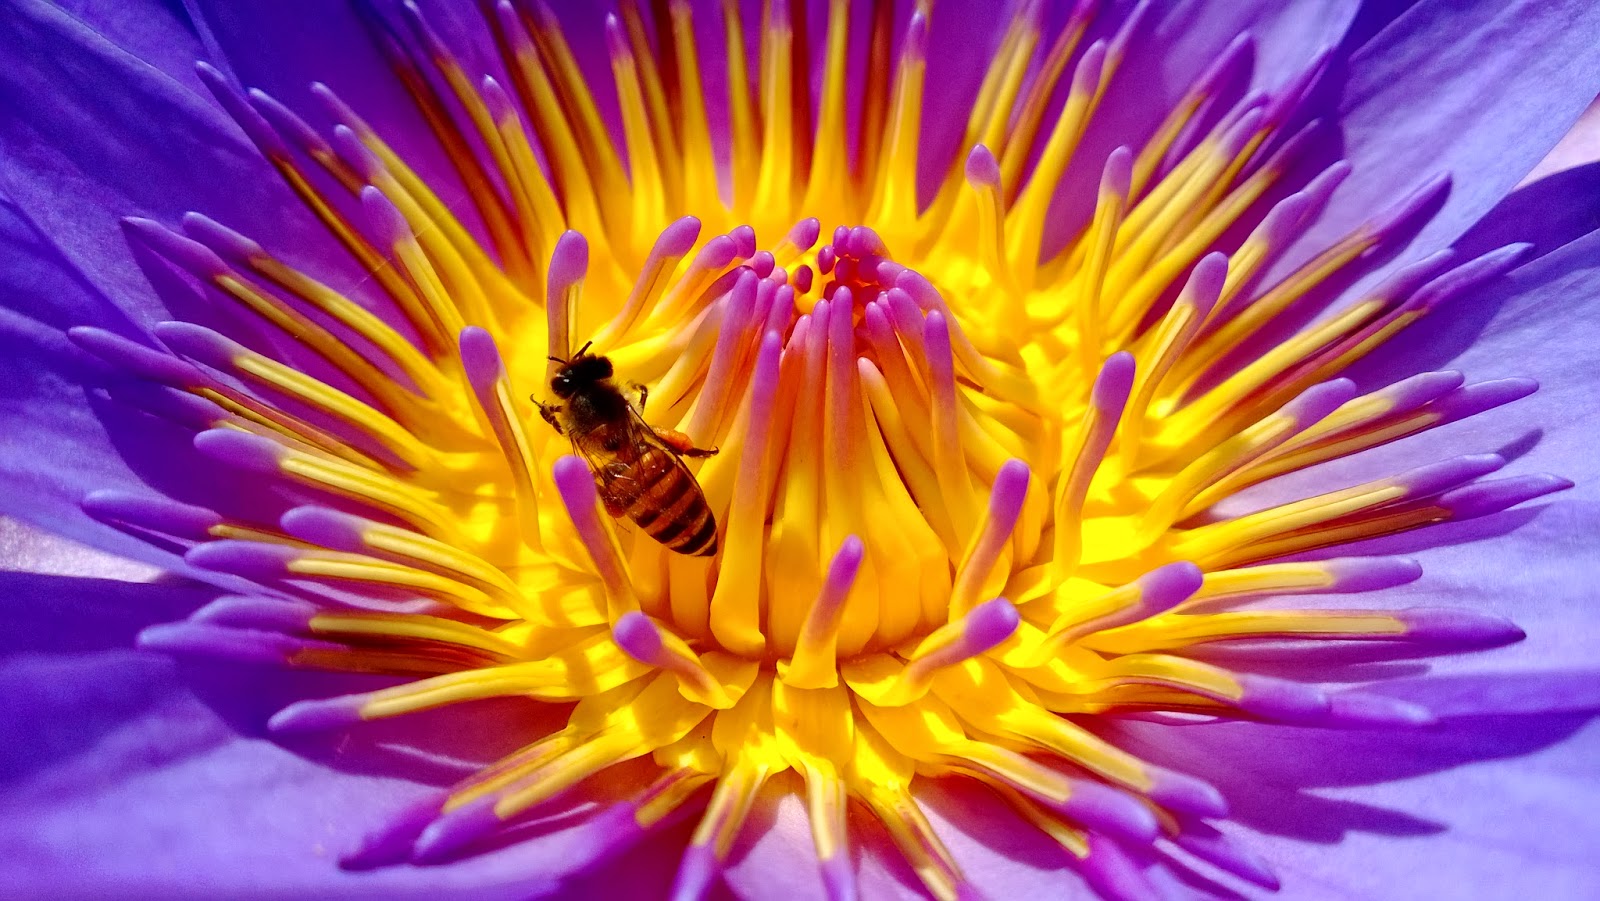
Macro photography is any type of close up photography that magnifies a subject to life size or greater.  This is called the magnification ratio and is seen on lenses like this: 1:1. A proper macro lens will reproduce at this ratio and some, like the Canon MP-E 65  will actually magnify up to 5 times larger than life size.  This would magnify a grain of rice to fill the frame of a full size DSLR sensor!

Successful macro photography can be a challenge and will certainly take practice and a lot of trial and error but when you get that perfect shot it will all be worth it.

Firstly, obtain a proper (1:1) macro lens or extension tube.  A dedicated macro lens  is important as a normal lens will not focus close enough to get any sort of detail in very small subjects.  Keep in mind that a macro lens can be used for general photography as well.  A cheaper alternative are the use of extension tubes (not to be confused with extenders) which increase the distance between the lens and the image sensor to allow you to focus at closer distances.  Either of these will ensure a good start in macro photography.

Manual focus is the name of the game.  A static object like a flower (assuming there is no wind around) or a shell is easier to focus on, simply because the only movement variable is you.  If you are using a good tripod, preferably with a macro slider, then it simply requires a little patience to obtain a sharp image.  Additionally, the use of a relatively small aperture such as f11 or f16 will provide more depth of field in the image.  Keep an eye on your shutter speed and use a remote release or the camera’s built in self timer mode to eliminate camera shake.  If your camera has a mirror lock up mode then this function would also be good to utilize.

Pre-focus is another great option. If you are trying to photograph insects a good tip is to set yourself up in an area where your target is likely to land or pass through and pre-focus on that spot.  A wireless remote release is a very helpful here as it will allow you to step away from the camera and begin firing as soon as your subject lands in the target zone. You may get a lot of unusable shots, but on the flip side you may also capture that perfect shot.

When thinking about lighting, the closer something is to the front of the lens generally means the difficulty to light it sufficiently increases.  In some cases your lens may actually cast an unwanted shadow on your subject.  Macro flash attachments (ring flashes) are very useful as they sit at the end of your lens to illuminate the subject.  You can also get constant light LED attachments that are not as powerful as a ring flash but are cheaper.  If outside, the sun can provide enough lighting for some subjects and you can use a diffuser to soften the light or to bounce light into the shadows.  

Every scenario is different so initially there may be an element of trial and error but hey, that's the fun of it!


Portrait Photography: A Beginner's Guide

This blog post will guide you through all the necessary steps to recreate successful studio lighting using Canon flashguns that can be set up in almost any situation, though the same setup may be achieved with other brands in a similar fashion.  Shooting in a studio or similar scenario is an excellent way to learn how light can affect your photos.  These lessons can be used in any photographic situation, be it a highly controlled studio setup or shooting with natural light in an uncontrolled environment.


DCW's Portrait Photography Demo at Sydney Morning Herald's Photo1440 Workshop


The following are some general rules for lighting -

1) The larger the light source when compared to the subject, the softer the quality of the light that falls on the subject. This is because the larger light source wraps around the subject, softening the edge of shadows.  As the light source gets smaller you’ll notice the shadow edges become more defined.

Moving a large light source closer to the subject also has the effect of softening the shadows while moving the light away makes the edge of the shadow sharper and more defined.        

If you diffuse a light source, the light scatters and results in a softened quality as the diffuser essentially becomes the light source. For example - On a bright, sunny day the shadows are strongly defined as the light source is far away i.e. the sun. If passing clouds then block the sun, the light will soften as it becomes diffused by the clouds, thus simultaneously drawing the light source closer as the clouds now become the source.  So you can look at it two ways - the hard light source is now diffused OR the light source is now very large and close.

2) Bouncing a hard light source off a wall onto your subject effectively creates a larger light source.

This occurs by making the wall a light source.  As the wall is much larger than the size of the flash, the light also becomes a lot softer.  This requires a greater power output from your flash as some light is lost from the wall and the light also has to travel further to reach the subject.  Be aware of the colour of the wall as the light from your flash will change to whatever colour the wall is i.e. red wall equals red light, green wall equals green light, etc.

3) Front lighting diminishes texture, side lighting (from any direction) emphasizes texture and rear lighting highlights the shape of the subject.

The direction of a light source has a big affect on the appearance of texture in an image. Lighting from the side will increase the appearance of texture on surfaces while light hitting the subject from the camera position will flatten the texture in an image. To achieve this, the light should be un-diffused as a diffused light source will soften the shadows and may even eliminate the texture. Light from behind the subject highlights the shape of the subject; a prime example of this would be a silhouette.

Some general portrait photography tips -

1) A messy background will interfere with a good portrait. That is unless the background helps to tell the story of the portrait.  For example - a violinist may have a portrait taken with their violin in the background to tell the viewer more about the subject.  If the background doesn’t assist the story then blur it out as much as you can with a large aperture or if possible, get rid of any distracting elements completely.  There’s nothing flattering about seeing images of people with trees sprouting from their heads.  

2) Have the lighting set up and the camera ready to go before your subject arrives so that they won’t have to wait for you upon arrival.
3) In portrait photography the primary area of interest and focus is almost always the eyes.  As humans, that’s where we look first. Because of this it’s critical that the eyes are in focus.

​4) The direction of a subject’s eyes is also very important in a portrait. Having the subject return the gaze of the photographer can give the viewer a sense of connection with the subject.  An alternative is to have your subject looking at someone or something within the shot, which sets up a story in the image.  The most obvious one is a mother with her child looking at each other.  If you imagine that same photo with the mother looking directly at the camera and not her baby, the image immediately shifts to a completely different vibe.
​5) Portraits are most commonly taken at the same eye level as the subject. Playing around with the angle can give a different perspective to the portrait. For example, shooting down on your subject from above, or up at them from ground level can change the viewer’s perceptions of the inherent power of the subject.

​6) Firing a number of shots at a time can either give you a series of images that work together or it can help you achieve one image that is natural. This is useful when you’re photographing somebody engaged in an activity or when working with kids.
Lighting Setup


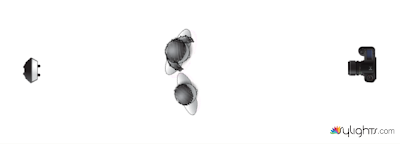
The following is a list of steps to recreate our portrait set up.  In this example we used 3 Canon 600EX RT flashes, 2 60x60 Mircopro soft boxes and a Honl light shaper (for the hair light).

Step One.

Flash 1 is set up with the soft box at a 45 degree angle to the subject.  The light in this photo is softer than a direct flash due to the soft box and off-centre position which creates a nice modelling effect upon our subject.  This light is referred to as the key light or main light as it is responsible for the primary lighting effect in the shot.  At this point the line between the lit part and the shadow is nice and gradual but the shadow area is quite dark. I set this flash at +1/3 exposure compensation to make the image a bit brighter.

Step Two.

To lighten this area we require a second light from the opposite side of the subject.  This light needs to be less powerful than the key light so it doesn't eliminate the modelling effect the shadow creates.  I set the power of this light to half of the power of the key light and use the same soft box on it.  This will lighten the shadows to even out the contrast while still keeping the shadow areas present but to a lesser degree.  I set this light at -2/3 exposure compensation.

Step Three.

Now we need to add a bit more light to the hair of our subject to create a bit of shape.  For this I put a Honhl flash bender onto the third flash.  I’ve put it into the shape of a snoot, which is simply a tube made to funnel light into a specific area of a photograph.  In this case I want the light to fall onto the hair of our subject to highlight it and give some definition and shape to the subject. To do this I simply aim the snoot towards the subject directly from the other side of the key light.  Also make sure you have a bit of height so you are shooting the light at more of a downward angle.  This has created a highlight effect that helps the image to pop and adds a bit more depth.  This light is set to +/-0 exposure compensation to make the highlights stand out when compared to the second flash.

So there you have it. A simple, quick technique for studio lighting to get you started.  Off-camera flash is a great way to begin learning about how different angles and quality of light can change the look of the subject.  Once you are confident in using flash then it is easier to know how the quality of existing light will look in your photos.  Using flash is also a really good way to train yourself to understand how different lighting can affect the photo you take and also trains you to identify lighting conditions and ways you can manipulate it to obtain a good result. 

Bonus Manfrotto Gloves with Selected Manfrotto Apparel!

So, Manfrotto are known for their long line of butt-kicking professional tripods, but did you know they also make some of the most stylish apparel around, purpose-built for photographers?

These italian made jackets, ponchos, vests, hats and more offer high quality and features suited to a professional shooting lifestyle. 


For a strictly limited time, if you purchase a Manfrotto Lino Jacket, Pro Poncho or Pro Photo Vest you will receive a bonus pair of Manfrotto Pro Photo Gloves valued at $329.00. Click the banner above to check out the range and add some style to your kit!