Recent Tweets

DCW Photo Q&A - Sports Photography with Peter Podlaha


This year's setting for the 2018 Commonwealth Games is our own beautiful Gold Coast so there’s a fair bit of excitement in the air. After all, sporting events never fail to draw a crowd. Among that crowd, you’ll always find photographers.

Athletes are fast-moving, unpredictable creatures full of emotion and ability. They’re great subject matter. But capturing them in a single sharp photo isn’t exactly a piece of cake. Luckily, we were able to chat with a seasoned pro: Peter Podlaha of Injected Ideas Photography.

Peter is a top-notch photographer and a top-notch athlete, so really, who better to ask? He’s given us a tonne of insight and valuable tips for budding sports photographers, including what gear to use and how to get started.

Check out the full Q&A below!

Check out that flex! Rapid fire action captured at just the right moment

Hi, I’m Peter Podlaha, a Sydney based photographer specialising in product photography and E-commerce with a fierce passion for high-intensity sports.

I’ve been clicking away on a full-time basis for 8 years; however, beyond that, the camera was never far from my hands. I work for a manufacturer of model trains and get to photograph models and collectables on a daily basis.

Aside from product photography, I love photographing sports, in particular, one that’s often forgotten about here in Australia; Ice Hockey.
It’s the raw emotion, struggle through physical pain and exhaustion mixed with a relentless, competitive drive to win that draws me in.

Following a fast-moving object like an ice hockey puck—sometimes travelling up to 160km/h— mixed with [the players’] blood, sweat, and tears gets my own adrenaline going. It allows me to give back to a sport and community that’s given so much to me my whole life.

Outside the studio and rink, you’ll often find me capturing the city and country around us. Landscapes and nature are where my creative juices start to flow. They allow me to express myself in a way that isn’t limited by a creative brief or four walls.

This is where the modern era of digital is put aside and a generation of tradition comes to life. For me, there is no greater way to do this than to emulsify it on film.

I can push, pull, and cross process in a way that’s been done for years. This freedom in camera and in the darkroom is where my limitations end and my creativity begins.

This is what drives me, this is what intrigues me, and this is what sets my heart on fire.

Sharp focus and a dramatic, blurred background shows off the need for speed

1.      Q. How did you get interested or started in sports photography?
          A. I got started in sports photography in 2011 with the help of one of my best mates. We’re both hockey players and we’d hang out before games photographing around Sydney, then go to hockey and I’d shoot the games. I would post the photos on social media for the players and quickly became well known in the community. In 2013, I became an official photographer for the Sydney Bears ice hockey team and was also approached by the AIHL (Australian Ice Hockey League) and have been an official photographer of the league to this day.

2.      Q. Favourite sport to shoot and why?
          A. My favourite sport to shoot is Ice Hockey. It’s my passion and having played since I was 8 years old helps a lot as you need to be able to anticipate the play due to the speed of the game. It also means I get to see the games for free! Perks of the job.

3.      Q. Is there a sport you hate shooting? Why?
          A. I wouldn’t say I hate shooting any sports. I’d photograph any sport and love the challenges each one presents.

4.      Q. Is there a sporting event you’d LOVE to shoot?
          A. A sporting event that I’d love to shoot is a game 7 of the NHL Stanley Cup final. Or the Olympics; that’d be awesome too. I’d shoot any event there, even table tennis or curling.

5.      Q. What’s your favourite lens to use? Do you ever use wide angles for sport?
          A. My favourite lens for sports has to be my Canon EF 70-200 f/2.8L USM. It practically lives on my camera. I’ll sometimes use a wide angle for a bit of a different perspective, though I use telephoto lenses most of the time.

Hockey isn’t always blood and bone-shattering hits. Sometimes, there’s smiles and celebrations all round!

6.      Q. How do you feel about weather sealed lenses? 
          A. Weather sealed lenses are great! Especially with a weather sealed body. I don’t like getting my gear wet, but it’s nice to know I can keep shooting without needing to worry about the odd bit of rain.

7.      Q. If money were no object, what would be in your sports photography kit?
          A. I shoot on Canon cameras, currently an EOS 7D MkII with a 7D backup. If money were no object, I’d have two EOS 1Dx MkII bodies, 70-200mm f/2.8, 24-70mm f/2.8 and maybe some nice wide angle and standard prime lenses. A 300mm f/2.8 and 400mm f/2.8 would be welcome additions too. 

8.      Q. How competitive is the sports photography industry? How do you go about gaining an advantage?
          A. This industry can be pretty competitive. At some games, there may be 2 or 3 photographers. To get an advantage, I try to stay ahead by having a plan of which shots to get, which players to look out for, and getting other interesting images of the crowd. I often find myself rushing home to get my images sent off to the league before other photographers. I also like to look through other photographers galleries to see what they’ve done differently and build on that for my next shoot.

9.      Q. In your opinion, what’s the best entry level lens for sports?
          A. I used the Canon 55-250mm f/4-5.6 kit lens for about 2 years before I decided I was getting more serious and had to upgrade. If you’re shooting outdoors, it can be a great entry level lens, though for indoor sports you’ll need to raise your ISO to compensate. If you’re on a budget, the best bang for buck would have to be a sigma 70-200mm f/2.8 EX DG OS HSM lens.

10.  Q. What kind of advice can you give beginners looking to start?
          A. If you’re looking to start sports photography, just look at the people around you. Everyone has a family member or friend who plays sport. Next time they have a game, tag along. Local club sports are a great starting point. Just make sure to get permission from coaches and parents first. Study the sport you want to shoot and look at what other photographers are doing. If you see another photographer at the event, don’t be afraid to ask them for pointers. When starting out be prepared to volunteer your time too. 

11.  Q. BONUS QUESTION – Single shot or spray and pray?
          A. When shooting sports, my camera is always in high-speed continuous shooting mode. There are techniques like tracking (a subject) or panning with the camera and shooting a sequence of shots. It's more of a matter of knowing how and when to use them effectively. With fast-paced sports like hockey, I’ll shoot bursts of about 3 frames. If I want to get a shot of a hockey player’s stick bending as they shoot, I’ll let off a longer burst. When I need to shoot a single frame, it’s easy to do even with continuous mode on. 

Concentrating is hard work. Don't forget to check behind you there, mate!

All images in this blog post were provided by Peter Podlaha. See more of his work on his website www.injectedideasphotography.com
Also, if you’re in Sydney, try and catch him in action at AIHL games around the city!

Into the Great Outdoors: Filters that take your landscapes to the next level


There is a massive selection of filters on offer to improve your landscape, seascape and cityscape photography. They can range from simple circular polarisers that screw onto the front of your lens to professional kits that hold various combinations of ND and Graduated ND filters.

We are spoiled for choice these days when it comes to adding creativity to our shots with filters, but there are types of filters that in our opinion are hands-down the best filters for landscape photography. 

Before we reveal which filters are our pick for “Most Valuable Player” though, let’s briefly go through some of the different types of filters available and what they do.

Ultra-Violet (UV) Filters

Most photographers are familiar with UV filters, they are used primarily to protect your lens and were originally designed for use with film cameras, because photographic films are sensitive to ultra-violet light which can cause haziness or fogginess.

Luckily UV light doesn’t affect image sensors like it does film, but UV filters are still incredibly useful as your first line of defence against drops & knocks.
A UV filter that has done its job protecting a lens from damage.
They range from $15 AUD for an After the Fact filter to $300 AUD or more for a high quality Manfrotto or Hoya filter.

The more expensive filters boast multi-coatings that reduce glare and ensure maximum light transmission, they are usually worth spending more on if you’ve already splashed out on a nice high-end lens.

Polarising Filters

These shady pieces of glass are strong contenders for the title of most useful landscape filter, they essentially work like sunglasses for your camera and make your scene darker by reducing glare and minimising reflected light. Polarising filters are incredibly useful in landscape photography.

By reducing the reflected light that enters your lens, the vibrancy as well as colour saturation can be increased to make the colours pop in leaves, grass and foliage. They can also be used darken the sky to bring out more detail in clouds.

Polarisers are perfect at boosting out the colours and increasing the vibrancy of a scene.
Circular polarisers can be rotated to adjust the intensity of the effect and are best used with a 35mm equivalent focal length that is no wider than 24mm.

A shot taken with a polariser on a 14mm lens that demonstrates uneven polarisation.
When attached to wider lenses you may see an uneven darkening of the sky, this is because polarisers are the most effective at a 90° angle from the sun so the part of the sky that is at a 90° angle to the sun’s position will be darker than the rest of the sky.

Light Pollution Filters

Photographers who shoot astro and cityscapes could benefit from using light pollution filters like the NiSi Natural Night filter that reduce colour casts caused by mercury vapour, sodium and low CRI light sources. They allow you to shoot significantly more detailed images at night.

An image shot with and without the Nisi Natural Night Filter
The video below shows some comparison images shot with and without a light pollution filter.

And the Best Filters for Landscape Photography are…… Neutral Density Filters

Able to turn an simple landscape into an extraordinary piece of art, the humble NeutralDensity (ND) Filter gives you greater control over the exposure of your scene by evenly reducing brightness.

ND filters are ideal to capture flowing water or moving clouds as a milky smooth blur while the rest of the shot is sharp.
They can range from a subtle ND8 (3 stop reduction), all the way to an extreme ND1000K (20 stop reduction), that can give you the ability to capture ultra-long shutter speeds for surreal photographic results.


But it doesn’t stop there, Neutral Density filters come in all shapes and sizes for a wide range of different uses.

Variable ND Filters

Variable Neutral Density filters are very popular with videographers so they can fine tune the exposure of their scene, without breaking the 180° shutter rule. They also allow the use of fast lenses to shoot with shallow depth of fields without over-exposing their shot.

Drone ND Filters

If you’ve got a DJI Mavic, Spark, Phantom, or similar then you can check out the extensive range of Drone ND Filters that are available for your aircraft. Using ND filters help to control the shutter speed of the camera to produce smoother looking aerial footage and images.

Drone ND filters mean you can add a subtle motion blur to your aerial shots.

Soft & Hard Graduation ND Filters

Kits like the Nisi Advanced or Professional Filter Kits usually include ND’s in a variety of different densities to block different amounts of light but they also include graduated ND filters which rather than reducing the brightness of the entire frame, transition gradually from being clear to dark.

Graduated filters are usually rectangular which lets you adjust the line up the transition to match your scene. They are available as a soft graduation that transitions from clear to darker gently, or as a hard graduation that has a more obvious line of transition.

Adding some filters to your  photography kit can give you more creative options when shooting.
There are even reverse graduation filters that can be used when the brightest part of your composition is in the middle of the frame, making them a very specialised filter for horizon sunrise or sunset shots.

Inspired and ready to take your landscape game to the next level? Stop by a store or our website and receive a 15% discount across a selection of our ND and Variable ND filters! Be quick. Strictly while stocks last. Ends 1 May.

If you want to know anything more about filters and how to use them to take better landscape images, give us a shout on our social media channels!

Facebook: Digital Camera Warehouse
Instagram: @dcwarehouse


Shift Your Perspective


It is a universally acknowledged fact that we, as people, love to document the places we visit by means of photograph. This travel tradition isn’t just limited to checking out new states or countries.

No, no, we do this all the time now, thanks to social media. We can post our “Hi mom!” pics from anywhere, even our favourite coffee place up the street.

Because we’re all a little guilty of using our phone cameras more than our actual cameras, we’ve probably noticed a difference in the field of view between the two. If this annoys you, there are solutions to help you capture more of what you’re seeing.

One of them is wide angle lenses. They don’t have to be extreme to get the point across, either.

Essentially, they let you fit more into your field of view which can lend to better, more expansive looking skies and landscape shots. If you’re travelling, this is a nice little option.

Another significant feature is that they can make small spaces look bigger or truer to life. This is a much better way for real estate and interior photographers to capture a broader, more realistic view of an entire room for clients.

These are the kind of photos that get people interested in visiting your space or inspecting your properties, so that’s really something to keep in mind if you provide these services.

As a comparison, we shot the interior of a car because that’s nice and cramped.


On the left, 16-50mm f/3.5-5.6 kit lens vs a 12mm f/2 wide angle lens on the right

We shot on an APS-C camera with a common kit lens and a wide angle prime. While the difference doesn’t seem like much on paper, you can see it in the pictures. The wide lens makes things look more spacious or further away. For a more dramatic comparison, here’s what a 28mm f/2 looks like next to the same 12mm f/2.

 Left: The 28mm f/2 lens becomes closer to a 42mm on APS-C.   Right: Still the same 12mm f/2 as above.

Yeah, this is way more noticeable. You can see that, even from the same angle in both photo sets, the space changes quite a bit as your field of view increases.

With this increase, however, there’s a conundrum; wide angle distortion.

This becomes very obvious when photographing humans with these lenses. Let’s just say they’re not ideal for portraits and leave it at that.

Most often, you might notice distortion around the edges of your image, especially when taking photos of things like buildings.

The nature of their optical design is such that, when pointed up or down, wide angle lenses can cause make vertical lines appear to pinch in at the top or bottom of the frame depending on how your camera is angled.

This is due to the convex curves of the glass elements. Light can’t enter the edges of a lens the same way it enters at the centre. So in exchange for the increased view, you lose a bit of clarity around the edges.

Enter the tilt shift lens.

These highly specialised lenses are all about perspective and sharpness. They come in a range of focal lengths, including wide angles.

Dang, is that lens broken? Nah, it’s just a Tilt Shift lens doing what it does best.  

As the name suggests, you can physically tilt and shift the optics within the lens, meaning you can setup your camera and make what seem like physical adjustments without actually moving it.

The shift function provides up and down, or side-to-side movements while keeping your sensor and focus planes parallel with the vertical object you’re trying to shoot.

If you’re wondering what the heck that looks like, don’t worry, we’ve prepared a diagram.

On the left, both focus and sensor planes are not parallel to the vertical buildings. On the right, they are.  

As you can see on the left, the sensor and focal planes are not aligned with the vertical rise of the buildings.  The top of the building could be distorted by the top part of the lens.

On the right, both planes are parallel with the buildings, but lens has been shifted upwards to put the buildings in frame using the sharper, central part of the lens.

So instead of composing your image by moving your camera around, you can do this by aligning it with the horizon and just shifting the optics up or down to get your ideal framing.

Once you dial in the perfect amount of adjustment, you’ll notice corrected vertical distortion and better edge-to-edge clarity. This means you can take advantage of the wide angle field of view to capture large structures in their entirety with better accuracy and sharpness. 

Here are some photographs we took with a tilt shift lens to show the difference it can make.

You can see what all of this looks like in the above images. The one on the left seems fine until you add some handy lines that show the verticals are actually at an angle. If those red lines were long enough, they’d eventually converge.

On the right, the lines are straight up and down. This was achieved by using the shift function on our Canon 50mm f2.8L Tilt Shift lens. Side by side, the difference is pretty significant.

Where these lenses truly shine, however, is in creating large scale prints of architecture or cityscapes. They let you capture beautifully sharp photos of buildings and structures without distortion to distract from your overall result.

Now, as you may have guessed, the shift function is only half of what these lenses can do. Stay tuned for our next instalment where we explore the strange and amazing tilt feature!

Want to talk tilt shift with us? Drop us a message on our social media pages

Facebook: Digital Camera Warehouse
Instagram: @dcwarehouse


An Introduction Binoculars and Why They’re Cool


Binoculars are one of those things that people find really fun and cool, but sometimes don’t know what to do with. Or what all the numbers mean. Or what all the weird terms are. Why do I even need these?

Well, for certain kinds of photography they can be incredibly important. For example, if you want to take pictures of wildlife, you have to find it first and binoculars can help with that.

First, let’s dissolve some of the confusion and give you a clear view of why these gadgets are so handy.

What’s with the numbers?

When looking at binoculars, you’ll notice there’s numbers everywhere like they’re supposed to mean something. Well, they do.

These numbers, like 8 x 42 or 10 x 50, aren’t just multiplication. They represent the amount of magnification the binocular provides and the diameter of the front objective lens which is responsible for gathering light.

Magnification x Objective Lens Diameter - So for 8 x 42 binoculars, you know you’re getting 8x magnification, with a 42mm objective lens to capture light and transmit the scene to your little eyeballs.

Obviously, a larger objective lens can gather more light, meaning you’re able to view a brighter image. But bigger doesn’t always mean better. Remember, you have to carry these things around.

Great, got it. Now what?

Now we’ll get into a few other terms you might encounter when searching for the perfect pair of binos. Yes, there’s more than just magnification and objectives, so strap in for a quick breakdown.

Field of View – Exactly what it sounds like. It’s how much of the scene you can see when looking into the eyepieces.

It’s good to note that as the magnification increases, the field of view decreases, so going with high magnification isn’t the be-all and end-all.

If your main use will be general viewing or spotting good locations and wildlife, having a wider field of view is ideal. It’s also better for tracking faster-moving animals which are challenging enough to catch in the first place.


We’ve all noticed this little bright dot when we hold up a pair of binoculars.

Exit Pupil – A virtual aperture that light passes through to reach your eyes. Just like a lens with a camera. Except in this scenario, the camera is your head.

If you’ve ever held a pair of binoculars away from your face, you’ve probably noticed a little bright dot in the eyepieces. That’s the exit pupil and yes, there’s maths to calculate its size.

Objective Lens Diameter ÷ Magnification
Example:  8 x 42 binoculars would be 42 ÷ 8 = 5.25mm exit pupil.

Cool, why does this matter? Well, just like some lenses are better in low light, the same is true for binoculars. Wider exit pupils send more light to your eyes which is better in dim lighting. It isn’t as much of a factor for daytime use, but at dawn or dusk, a larger exit pupil will help.

Bonus fact:  Because human eyes dilate in darker conditions, they’re able to make better use of the amount of light transmitted by a larger exit pupil so your image looks brighter. #suddenlyscience


Pretty easy to spot the difference between Porro prism binoculars (left) and a pair with roof prisms (right).

Prism Type –Binocular optics use either roof or Porro prisms. Usually, you can tell by how they look; if the eyepieces and objectives lenses are in a straight line, they’re roof prisms. If the objectives are wide-set and not aligned with the eyepieces, the binoculars are Porro prism based.

In the past, Porro prisms were the way to go for image quality as they could reflect more light and provide a much clearer, brighter image. Their design, however, makes them a bit heftier, so they’re not always the most portable option.

Roof prisms are positioned in parallel with the lenses and eyepieces, meaning the body size can be more compact. The downside of this style was that it used to reflect less light, so image quality wasn’t the brightest.

Nowadays, the choice mostly comes down to cost. With the introduction of lighter weight materials and more reflective prism coatings, both styles can perform similarly. If you’re looking to save a few bucks without compromising on image, grab a pair of Porros and for portability, look into some good roof prism based models.

Phase Shift – This applies to roof prism binoculars. If you’re leaning toward this style, make sure you look for phase correction coatings.

When light enters the optics and reflects off the prism’s multiple surfaces, the light becomes partially polarised and splits into two misaligned beams.

Without corrective coatings, overall image quality will suffer from lower contrast and clarity, so you definitely want to make sure your chosen pair has the right coatings for a better and more accurate viewing experience.


Image Stabilisation (IS) – Some binoculars have image stabilisation to minimise the appearance of shakiness and movement. This is a really great feature if they’re going to be used every day for critical viewing applications, like rescue spotting or even just to help reduce fatigue.

Of course, some binoculars have a tripod thread, but if you’d rather go handheld, IS will make a world of difference.

If you’re planning to go down this route, Canon has some of the best options available. We were lucky enough to get our hands on some and let me tell you, we spent a lot of time peering out our office windows and whispering “Wow…” when the stabilisation kicked in.

In the above video, you can clearly see the huge difference it makes. Both the view and movement get much smoother and easier to track. The subject, on the other hand… kinda suspicious looking.

To understanding what is happening internally with image stabilisation, Canon have put together this demonstration video of the moving parts inside of one of its binoculars.


And now, young grasshopper, you’re ready

You may have noticed a common theme in the above terms and features. Much like cameras, some binoculars are more suited to certain applications than others. Choosing the right pair depends quite heavily on what your primary use will be, so it’s important to determine that before buying.

A compact pair of roof prism binoculars, 8 x 32 or 8 x 40, is a reasonable starting point for the casual observer. These are easily portable and can be found more cost effectively while still offering a good amount of light transmission, magnification, and field of view.

There are more purpose-built options out there, but that depends on you. Binoculars aren’t a requirement for any kind of photography, but they can sure as heck make it a lot easier to suss out good shooting locations or track and spot photogenic wildlife.

Hot tip for all you astro-photographers out there! Binoculars make a great celestial object spotting tool.
Of course, binoculars aren’t just for spying on animals. Certain models work well for other cool hobbies, like stargazing, and make an awesome companion for a telescope or camera.


A photographer’s arsenal can seem endless, but once you make the jump towards a certain style, you start finding the little things that can make a big difference to your images.

Hopefully this has helped demystify binoculars a little bit and given you a few reasons to think about getting some for yourself!

If you’re up for more binocular chat and tips, give us a shout on our social media channels!

Facebook: Digital Camera Warehouse
Instagram: @dcwarehouse


Top 5 Macro Tips - How to Get Better Close Up Shots


Macro photography encourages you to get up close and personal to your subject, whether it’s an eight-legged, hairy arachnid or a cute little bumble bee covered in pollen. The word macro means big, which is kind of ironic because the subjects are usually tiny, but macro photography is about making images with extremely fine detail that reveal the microscopic world right under our noses.

It can also be a fun way to slow down and explore your own backyard, and I don’t mean pack a camper van and set off for a nice coastal drive, I mean literally go out into your backyard and take pictures of bugs and caterpillars.

Before you delve into the world of macro photography though, there are a few things you should consider. We’ve put together a list of the best tips and tricks as well as some hints to help you make the most of the little things in life.

A stunningly vibrant macro shot with a Ladybird beetle captured by Jill Heyer.

How Close is Too Close?

Once you find a subject that would make a good macro shot, the first thing you’re going to want to do is get your camera as close as possible, right? Macro is all about capturing an image that fills the frame with intricate detail and this is where a tiny bit of lens knowledge can help avoid blurry shots, missed opportunities and general macro-related sadness.

Every lens has a physical limitation called a minimal focus distance, which is a technical way of saying “This is as close as you can get and still focus on your subject”. You may have seen this number printed on the side, front or bottom of your lens. It might look like the highlighted part of the lenses below.
A comparison of different places you might be able to check to find your lenses minimal focus distance.

The part you’re looking for is the measurement in metres. So, for the first lens it is 0.28m or 28cm, for the second it’s the number in the middle, so it is 0.185m or 18.5cm, the top number on this lens is the magnification ratio (we’ll get into that in a bit), and the bottom number is the distance in feet, and finally the last lens has a minimum focal distance of 0.19m or 19cm.

If your subject is closer than the minimal focus distance of the lens, no matter how much you spin the focus ring it just won’t look sharp. If you’re using autofocus (which is not really recommended for macro) you'll hear the autofocus motor hunting back and forth trying in vain to focus. By simply moving your camera further back you should be able to focus and get the shot.

Fun Fact: The minimal focus distance is measured from the sensor plane and is indicated with this symbol “Φ”. In camera talk this is called the focal plane mark or the film plane mark. Feel free to annoy your friends and family with that priceless piece of trivia information.

A macro shot of the focal plane mark on an A7r Mark III mirrorless camera
Check the specifications of your lens to find out how close you can get to your subject and still focus properly. You can also buy specific Macro lenses for a range of different camera mounts like Canon, Micro-Four Thirds, Sony and more that have a closer minimal focus distance and something called a 1:1 magnification ratio.

Keep in mind Nikon call their macro line-up micro lenses, which is technically accurate, even if it is more confusing for everyone else.

Another thing to note is that some manufacturers refer to a working focus distance rather than a minimal focus distance. What is the difference? Well working distance is measured from the end of the lens, where focal distance is measured from the focal plane, or in other words from the sensor.

1 to What? – Magnification Ratios

Many lenses claim to have a macro ability but only those with at least a 1:1 magnification ratio can be considered a “true” macro lens.  So, what is a 1:1 ratio and what does it mean? Is it a made-up term to make us buy more expensive lenses?

Short answer? No, having a 1:1 ratio lens allows you to get significantly closer and still get the shot in focus, making them super useful for macro shooters. Get your hands on a macro lens at any of our stores and you'll quickly realise how much closer you can get with a 1:1 lens. 

A 50mm lens focused at 19cm with a 1:2 ratio compared to being focused at 16cm with a 1:1 Magnification Ratio


Long answer? Okay you asked for it, if you’re still reading this I’m going to assume you want all the gritty confusing details. If you’re happy to know the “why” without knowing the “how” why not skip ahead to the next tip.

A 1:1 magnification ratio means that your subject will be projected onto your sensor at the exact same size as real life. For example, if you have a 1-inch sensor and you take a picture of a ruler you will be able to fill the frame from left to right with 1-inch of the ruler and be able to get the shot in focus as long as it's at exactly the minimum focal distance.

This means with a 1:1 lens you're creating a shot with a 1x magnification, but there are lenses with a greater magnification ratio. The Lawoa 60mm Ultra-Macro Lens has a magnification ratio of 2:1 meaning it projects an image twice as big as real life onto the sensor while the Canon MP-E 65mm has a massive 5:1 magnification ratio making it more microscope than lens.

Steady as it Goes – Using a Tripod

One of the things you’ll notice shooting macro, is that the depth of field is shallow, and we are talking crazy shallow with a tiny sliver of focus that can bounce around every time you inhale. This ultra-blurry depth of field makes it almost impossible to shoot handheld.

But wait a second, can’t I just close down my aperture to like f/16 or f/22 and get the whole scene in focus? I like your enthusiasm but unfortunately at these magnifications, even using higher f-stops you’re going to struggle to get the whole shot in focus. Not to mention that by stopping down you’ve just made your shot darker, which doesn't help your cause.

Most Macro shooters will shoot at these large f-stops as a standard but if you want to bend the law of physics to get wild in focus shots with a very deep depth of field I would recommend reading our Introduction to Focus Stacking Blog, you will still need a very important extra piece of kit though to get really steady shots.

A shot of a tripod, admittedly pointing in the wrong direction for macro. Photo by Andre Hunter


The trusty tripod is used by most macro photographers to remove vibration and control their composition. So, which one is best for macro? Essentially any tripod will work but one with a centre column that can be set horizontally like the Manfrotto 190 Go or the 290 Series are best. Some tripods like the Vanguard VEO 204AB offer 180° of movement to position the centre column, allowing your camera to get into more weird and a wonderful positions than a yoga teacher showing off.

Hot Handheld Hint: If you don’t really want to shoot with a tripod, you can try shooting with a fast drive mode like continuous burst combined with a fast shutter speed of at least 1/200th of a second to reduce blur from hand shake. A fast shutter might cause the shot to become darker, so you may need to raise the ISO, which could result in grainier images but you’ll have an improved chance of getting a sharp shot. Also a fast SD card is essential when shooting in “Spray-and-pray” mode to ensure you can keep taking photos without waiting for the camera to offload your shots.

Get Focused and Stay Focused

If you’re all about getting your lens as physically close to your subject as possible, and let’s be honest who isn’t when shooting macro, you’ll want to lock your focus ring at your minimal focus distance setting. But how do you change your focus if you can’t change the lens settings?

Well, you need to move the entire camera closer or further away from your subject to focus. Sounds annoying, right? Well it is, but there are some nifty tools called Focusing Rails like the Kiwifotos FC-1 that allow you to make ultra-fine adjustments to your camera position in order to adjust focus and framing.
The Kiwifotos Focusing Rails in use capturing an image of a rose.

Lighten the Mood.

The microscopic world is infinitely interesting, with a never-ending list of subjects to capture, but unfortunately there is one finite resource that you'll discover is in short supply, and that is light.

Shooting with stopped down apertures to help achieve a deeper depth of field, or using Extensions Tubes to hack your minimal focus distance all have a downside and that is a dramatic reduction in the amount of light that hits your sensor.

This means you’re going to end up with darker shots unless you can find a way to effectively combat the loss of light. Luckily in this modern age adding extra lighting to your shot is easier and more cost effective than ever before. There are a wide range of Macro Flashes, Ring Lights and LED Lighting available for almost every type of camera.

There are some really specific macro lighting tools out there, for example the Laowa KX-800 is a flexible twin flash with a built-in LED focus light that allows you to position your lighting exactly where you want it.

It is a manual flash, so keep in mind that the final shot will look different to how it looks through the viewfinder and keep your shutter speed slower than 1/250 for most camera models. Whack it onto your camera and you even might start to feel a slight affinity for some of your subjects.

https://www.digitalcamerawarehouse.com.au/laowa-kx-800-flexible-macro-twin-flash
The Laowa KX-800 flexible flash look like something out of a bad 80's horror film but can add extra light to your shot.

Want More?

There is often more than meets the eye with macro photography, and like any skill the more you do it the quicker you will level up and improve.

The tips and tricks we mentioned are by no means comprehensive, there are a lot of complexities with macro and even more specialised gear top understand like tilt-shift macro lenses, Canon lenses with built-in LED lights, or even macro lenses for your mobile phone.

February is Macro Month at Digital Camera Warehouse. If you want more information about macro photography techniques pop into one of our stores because we have exclusive offers, hands on demonstrations and more.

If you’re up for an extended chat about macro photography or looking for some extra tips, give us a shout on our social media channels.

Instagram: @dcwarehouse

Infographic Comparison: Panasonic GH5 vs GH5s


So how does the Panasonic Lumix GH5 compare against the Panasonic Lumix GH5s?
We have had a go simplifying the comparison between the two with our latest Infograph


With the release of the Lumix GH5s, Panasonic now have two flagship GH series cameras, designed for video shooters but which one is right for you?

The GH5 is perfect for run-and-gun filmmakers who need the flexibility of hand-held shooting with in-body stabilisation and the ability to shoot high resolution stills. In comparison, the GH5s is aimed squarely at professional cinematographers looking to combine the faster frame rates and dual native ISO low-light performance with a gimbal, slider, jib or other movement tool for complete cinematic control.

Watch the latest video to check the dynamic range & low-light performance of Lumix GH5S.


2018: New Year, New Photography Resolutions


Hello and welcome to 2018! It’s safe to say the festive season is officially over. No more frantic trips to the shops, the number of family gatherings has dwindled, everyone’s disappeared back into the woodwork until next time.

For some, this time of year is a welcome change from the hustle and bustle of the holidays. Getting back to the familiar routine of your daily grind can almost feel calm in comparison...almost.

That said, a new year means a fresh start. A chance to really jump on the goals we shoved to the backburner in all the hectic celebrating. New Year, new me, am I right?

Come January 1st, resolutions are being made with reckless abandon as most of us are itching to do something new, something different. This could be anything from DIY projects, to hitting the gym, to learning how to make a cracking Pavlova. 

But for those of us that love taking photos, why not tackle a project more relevant to our interests?
Something like a 52-week photo challenge, perhaps?


Snapping 52 photos in one year doesn’t sound like a lot, right? Challenge accepted!

The 52-week challenge is exactly what it sounds like; one new photo every week for a whole year. No big deal, right? Didn’t think so.

Let’s face it, we could always take more photos. For some of us, it’s a hobby, for others it’s something more, but when it comes to shooting for fun, we all find ways to just… miss out.
Taking on a challenge can seem daunting, but it can also be revealing and very fulfilling. All you need is your camera and a little accountability.

There are so many challenges readily available on the internet, even 365-day ones, but let’s not get ahead of ourselves. You want to ease back into this ‘taking photos for fun’ thing nice and gently and a 52-week challenge should do exactly that.

This exercise is primarily about learning and enjoyment. It’s a great opportunity for novice photographers to push their skills, as well as a chance for veterans to brush up on the simple stuff.
The idea is to just get out there. Take photos for yourself or just for the sake of taking them at all.


Doing your homework always pays off. Spend a little time looking for themes and ideas online before starting.

You might be wondering how to get started right about now. Well, there are a few things you can do, but first things first; dust off your camera, mate.

Next, start thinking about what you can shoot. Taking one photo per week doesn’t sound like a lot, in theory, but it can be challenging to keep coming up with new and creative looking images as the months stretch on.

That’s where themes come into play.

A little research and preparation can save you from becoming demotivated down the line. Before pressing the shutter, try finding some themes you can use as inspiration, rather than just hoping you’ll find something new and interesting to shoot each week.

There’s plenty of existing photo-based challenges, theme sets, and mood boards online already, so be take the time to check them out for ideas.

If you’re going to come up with your own themes, try and aim for at least 10 at a time. That gives you a good buffer to work with and also makes the amount a little more manageable.

When borrowing existing themes and challenges, have a look through the whole thing beforehand to make sure they’re achievable with the gear you currently own. 

This is important for those just starting out as you don’t want to take the wind out of your sails by picking a theme set that involves very specific or advanced techniques.

At the same time, you don’t want to make things too easy. It is a challenge, after all, and pushing yourself to try new things is kind of the whole point.


Staying motivated isn’t exactly the easiest, but with a bit of help and preparation, you’ll nail this challenge!

Just like any other resolution, you might find yourself getting a little less enthusiastic about this whole endeavour as the weeks wear on. Sure, when you first started, everything was fine, you were gung-ho, all guns blazing.

But now you’re busy with work and the weather’s been garbage lately anyway…
No dramas, we’ve all been there so here are a few little tips to keep you motivated!

First off, don’t let yourself make excuses. They’re a lot like a packet of chips; you often can’t stop at just one. If you do have to miss one week, don’t skip the theme, just do two next time.

Battle temptation by making sure you celebrate the little wins. Completing a whole month deserves a little celebration. Maybe buy yourself that new camera strap you’ve been eyeing for a while. 

Acknowledging your achievements will go a long way in helping you get all the way to week 52.
Think about why you decided to do this in the first place. Was it to hone your skills, or just relax and do something fun? Maybe you’re doing this to ‘earn’ your next big piece of gear.

Having an end goal in mind when you start can help keep you focused along the way. Sharing your work on social media sites like Instagram is an excellent and easy way to track your progress. Not to mention, your followers will also be around to nag you if you’re late with your weekly update.

Speaking of other people, make it a group effort! Everything is more fun with a friend and this challenge is no exception. Whether you’ve got a photo-loving pal or significant other, get them involved. It’s a great way to boost your creativity while also giving you the bonus of a second set of eyes to critique your shots. 


Armed with some handy tips and inspiration, what else is left but to get started on this year-long adventure?

We all have different reasons for picking up a camera and snapping a photo. We have different styles, viewpoints, and imaginations. The best part of taking pictures is that there are no real rules. You capture the memory or feeling you envision and it’s not supposed to be the same as anyone else’s.
The same applies when embarking on photo challenges. Even though you may be taking on the same topics as several other people, it’s your individual perspective that makes each photo unique. Different interpretations of a common theme are part of what makes these challenges so exciting.
It gives us the opportunity to grow and change and see things in a new light. And really, that’s what makes a challenge worth doing. 

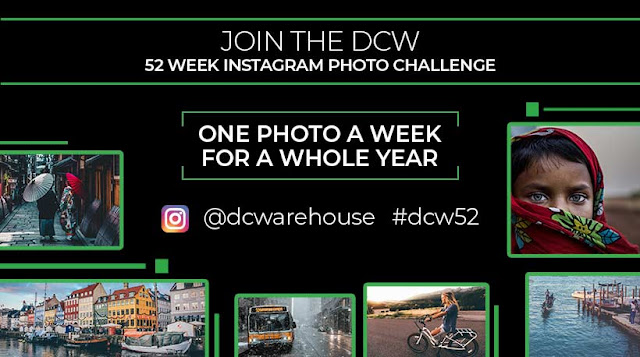
At DCW, we’re hosting our own 52-week challenge to get our friends, and ourselves, back on track.
If you’re interested in watching the story unfold, check out and follow our Instagram @dcwarehouse for cool photos and a few little surprises.

Want to participate in the DCW 52 Week Photo Challenge? Of course you do! Be sure to follow us because we’ll be dropping new themes every Wednesday.


Just use #dcw52 to tag your photos so we can find you and give your pics some love!